3. Going public - Allowing others to browse and search your pages |
Your username and your password will be told to you in class. Assume for this exercise that your username is 'tute99'.
In Netscape Composer the selection [Edit | Preferences | Composer | Publishing] "Publish to (FTP or HTML)' box should be set to read
ftp://student.austlii.edu.au/home/unsw/tute99/You should also complete the 'User Name' and 'Password' boxes below with your details, then OK to complete. Do not include these details on a computer which is used by others - just enter them every time you intend to publish new pages.
 to open the 'Publish Files' window. Click
on 'Use Default Location'. All of your details should appear. If they do not,
complete or correct the boxes under 'Publishing location' manually. You must include
your username and password. OK to complete. A message will appear to inform you
whether or not you have successfully published your page to the sandpit server.
If you published a pages as:
ftp://student.austlii.edu.au/home/unsw/tute99/FILENAME.HTMthen you browse the page as:
http://student.austlii.edu.au/unsw/tute99/FILENAME.HTM
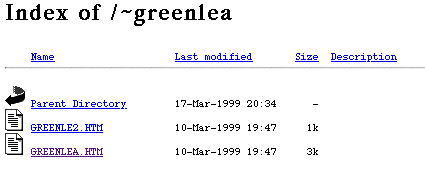
For example, if you browse to Graham Greenleaf's /public_html/ directory on sandpit,
http://student.austlii.edu.au/~greenlea/
you would see the following automatically generated index, which allows access to all pages currently in my /public_html/ directory:

The proper way to stop this happening is to place a page called 'index.html' (or 'index.htm') in each directory or sub-directory. Each 'index.html' page should only contain links to those pages which you wish to allow to be browsed. The 'index.html' page stops an automatic index being generated.

Alta Vista provises the Systran translation software which allows you to provide your users with the option of translating your pages into a number of European languages.
For example, the URL http://babelfish.altavista.digital.com/cgi-bin/translate?urltext=http://www2.austlii.edu.au/~graham/ will give you the option to translate the home page of one of the authors of this Tutorial.
To create a translation option from your own page, create a link named something
like 'Translate this page' and use  to link it to
http://babelfish.altavista.digital.com/cgi-bin/translate?urltext=URLof my page
NetMechanic offers various services but the two most fundamental are:
There are numerous other diagnostic tools listed on Yahoo's HTML Validation and Checkers page.

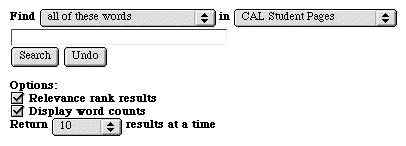
 button on the search engine page.
The Sinomake program responds with the message 'Now running sinomake', and a list of any pages that do not have proper titles.
Each page should have a title which indicates both (i) the set of pages to which it belongs; (ii) how it differs from other pages in the set. For example, these three titles are helpful:
Basil's Bankruptcy Place: Overview
Basil's Bankruptcy Place: Legislation
Basil's Bankruptcy Place: Leading Cases
Open the search.html page in the Editor, and copy all the content of the page into memory. Then open one of your own pages in the Editor, and paste the content of the sinoform.html page into that page.
META tags contain both the name of the type of information that is contained in the tag, and the content of that information. For example:
<META  name="description" content="Graham's IP page - a ramble about the deficiencies of Australia's intellectual property laws.">
<META  name="keywords" content="copyright, intellectual property, moral rights">
Some search engines will then index both fields, so a search on either `IP' or `intellectual property' will match and will cause the page to have a higher ranking in the list of search results than it would otherwise. In some cases the description will be included in the search results. Otherwise, some search engines only show the first couple of lines of the page, or just the title.